
Antminer S4 is the first powerful miner that reaches 2TH hash rate. In this tutorial, we will demonstrate the setting-up for Antminer S4(2TH @ 1400w) bitcoin miner.
Miner Specifications
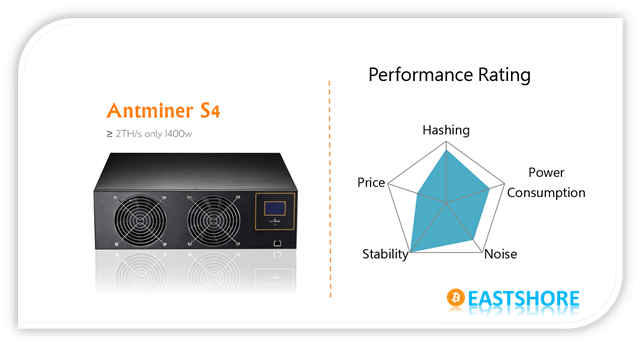
| Brand | Antminer S4 |
| Hash Rate | 2 TH/s ± 5% |
| Power Consumption | 1400W ± 5% |
| Chip | 28nm |
| Network Connection | Ethernet |
| PSU | with PSU, plug & play |
Important Note
- DON’T overclock the Antminer S4. Don’t change anything in the “Miner Configuration –> Advanced Settings” if you don’t know what you are doing.
Official Manual
Preparations
- Connect the miner to the router with an ethernet cord.
- The default IP of the miner is “192.168.1.xxx”, make sure the IP your router is “192.168.1.xx” too(eg. 192.168.1.1).
- Use the ethernet cord to connect the miner to the same router which your PC is also connected. (Your PC is just needed for miner configuration)
- We pack products very carefully, but there are rare risk that cables loosen up during the shipping. So if the miner cannot start normally, open the case and check if all the cords inside the miner are properly connected.
- If you have several miners, make sure to space them out for heat dissipation.
MINING GUIDE
-
Connect the miner to the router with the ethernet cord. Power on the miner. Press the switch button (as indicated in following picture) on the miner for a few seconds until the fan runs and the LED light lights up.

- Wait for about 1~3 minutes, until the blue LED shows IP details. (some miners take shorter time, some will take longer time.)

-
Now, let’s find out the Default IP address of the miner. There is a specific IP address for every miner. From the LED, you will get the IP address. As in the following picture, the IP of this miner is “192.168.1.13”.

-
If the IE can’t open the address you entered, try a few more times. (sometimes, the miner needs about 10~30s to connect itself to the router)
- If the you get a pop-up when you open the configuration page ask for verification, input “root” for both the username and the password.

- Then you will get in the configuration page of the miner.

- Set your mining details in the “Miner Configuration” page, and then click “Save & Apply” to save the changes.
- It is not recommended to change any settings in the “Advanced Settings” in the Miner Configuration page if you don’t know what you are doing.
- In the “Miner Status” page, you can monitor the mining details (speed etc.). (NOTE: the speed here may not be so stable, especially for the GH/s(5s). Don’t worry, it’s normal, refer to the speed shown on the LED screen. If you do mind this, upgrade the firmware of the miner to the newest version. For how to upgrade the firmware, refer to the section {Upgrade Firmware} below.)

- Mining will start automatically after the miner powers on.
- If the speed is not about 2TH/s, just restart the miner. (That happens occasionally)
- That’s all you need to do to get the miner run. Happy mining.
Upgrade Firmware
If your miner works very well, you can skip this section.
- Check the version of the mining system.

- Download the newest firmware here (IMPORTANT: Please pay attention to the date of the firmware you download, it should be more up-to-date than the version your miner got. Don’t upgrade the firmware to an older version) https://github.com/eastshoremining/Antminer/tree/master/Antminer%20S4
- The firmware you download is a “.tar.gz” file.
- Open the upgrade page: “System” –> “Upgrade”

- Click the button “A” to select the “.tar.gz” file you just downloaded, then click button “B” to upgrade the firmware.
- Wait for about 1~5 minutes while the system upgrades.
- You may get an error message page like below.

- Wait for about 1~3 minutes, reopen the configuration page (take the picture above as an example, input the IP “192.168.1.14” in the address bar).
- Then you can do other settings for configuration.
- You can also have a look at the official manual for more details about firmware upgrading. (The page 6, section “5.1 System Upgrading”), check here: https://github.com/eastshoremining/Antminer/tree/master/Antminer%20S4
- After you upgrade the firmware, check the version of your firmware.

- That’s all for firmware upgrading.
Fireware Upgrade — Use image
If you miner works well, refer to the section {Fireware Upgrade} above to upgrade your firmware. The following are instructions for using image to upgrade.
- Download the firmware here: https://github.com/eastshoremining/Antminer/tree/master/Antminer%20S4
- The software for firmware upgrade Win32DiskImager is here: https://github.com/eastshoremining/Antminer/tree/master/Tools
- Take out the mini SD card inside the box as indicated in the picture below and insert it to an SD card reader (or a miniSD card reader) .

- Insert the SD card reader (with SD card) to the USB port of your computer.
- Upgrade the SD card to the firmware you downloaded:

- Insert the miniSD card to the box again and do all the configuration again.
Troubleshooting
Trouble 1. Mining never start, there is nothing showing on the LED screen, and you can’t open the configuration page(192.168.1.xx).
- Sometimes the miner takes longer to begin to work. We have encountered this issue in our experience, some miner needs about 7-10 minutes to get started. After powering on, wait for 7~10 minutes, until the noise of the fan diminishes, then wait about 1-3 minutes, and the IP will show on the LED screen, the miner will work.
- Check if your home network setting is normal.
- Check if your home network connects the mining pool address you set in the “Miner Configuration”.
- Set the protocol to DHCP.
- Check all the cables inside the box if they are properly connected:
- Open the case of the miner.
- You will find a little blackboard inside the miner.
- There is a micro sd card on the blackboard, insert it tightly.
The sd card is as indicated in the picture below:
- After you set the pool address etc, click “Save&Apply”. While waiting the settings to apply, don’t click anything.
- Upgrade the firmware login the configuration page. Some old version of the mining system may get this “no data” problem, upgrade the firmware to the newest version.
Trouble 2. “x” showing on the ASIC Status
For the ASIC status wise, “x” doesn’t necessarily means the chip is faulty or failing. If the hashing power is compromised, check your PSU and wiring and reboots. It should go back to an average 2000 ± 10% GH/s per AntMiner S4.
When you are getting “x” on the ASIC chip status, try the following:
- Power off the miner, waits for some minutes, then power it on again.
- Check if the miner is too hot.
- If you have several miners, space them out.
- Open the box (and keep it open) to make the blade inside to get cooler.
- Get more fans or other dissipation methods to cool down the miner.
- Turn off the Antminer and check if your PSU cables are connected properly. Then restart.
- Check the status every 30 minutes for a few hours and see if the “x” persists or goes away.
We have encountered such issue when testing, there are some “x” showing on the ASIC chip status as in the picture below:

Then, we restarted the miner, the “x” disappeared.
