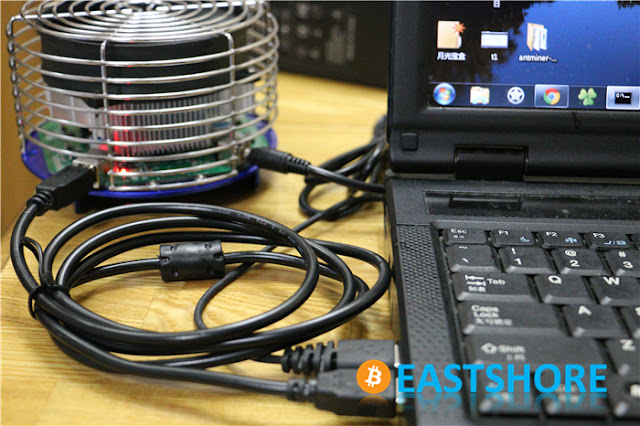
Antminer U3 is a bitcoin miner with petite size and it’s a good option for beginners. In this tutorial, we will demonstrate the setting-up for Antminer U3(63GH @ 63w) bitcoin miner.
Miner Specifications
| Brand | Antminer U3 |
| Hash Rate | 63 GH/s ± 5% |
| Power Consumption | 63w |
| Chips | 28nm chip |
Preparations
- If you have bought the PSU package in our store, there is no power cord included, you need to prepare a power cord for the miner.
- If you haven’t bought the PSU package in our store, please prepare a ATX PSU (>= 100w, with 6pin x 1) by yourself.
Miner Connection
- If you have bought the PSU package in our store: please connect the PSU to the miner directly, then, connect the PSU to the socket on the wall with the power cord you prepared.


- If you haven’t bought our PSU package: you need to connect the miner to the 6pin cable of your ATX PSU by the “6pin to DC” cord included in the package.


- Miner connection done.
- Connect the miner to the USB port of your PC with the data cord.

- ALL connection done.

MINING GUIDE
- Download the driver: CP210x USB to UART Bridge VCP Drivers
- Set up the driver “CP210x_VCP_Windows”(For 32bit OS, please install “CP210xVCPInstaller_x86.exe”; for 64bit OS, please install “CP210xVCPInstaller_x64.exe”).
- Download the mining softwares: https://github.com/eastshoremining/Antminer/tree/master/Antminer%20U3
- Connect all the cables. After you connect the PSU, the fan of the miner should be working.
- Connect the miner to the USB port of your PC.
- If your PC shows up “setting up the driver”, wait it to finish.
- Run the zadig_v2.0.1.exe in the software package you download.
- Choose “Options—>List all drivers”, and then in the pull-down list (as shown in Picture 1(see below)), there are one “CP2102 USB to UART Bridge Controller”, choose it and click “Replace Driver”.
- After the replace work done, close zadig.
- Pull out the USB cord of the miner and power off the miner.
- Then Power on the miner again.
- Connect the miner to the USB port of your PC via data cord again, and please note: insert in the same USB port as before.
- Change the “autorun.bat“. Use the notepad to open it and modify it. The mining command in the .bat file is as the following, please change the “pool_address_1, pool_address_2, miner_account_1, miner_account_2” to yours.
cgminer.exe --bmsc-options 115200:0.57 -o pool_address_1 -u miner_account_1 -o pool_address_2 -u miner_account_2 --bmsc-voltage 0800 --bmsc-freq 1286
- Run the “autorun.bat”.
- Then it should be working as in the following picture:

Run more than one miners
There are two ways to run more than one miners together:
- METHOD 1: Connect all the miners to the USB port of your computer, and run them together.
- METHOD 2: Use a USB-hub (Which is connected to your PC) to connect all the miners and run the miners.
Here is the guide for how to mine with 2 miners with a USB-hub.
- First, refer to the {mining guide} above, run each miner individually to confirm each miner works well.
- Connect all the miners to the USB-hub, then connect the USB-hub to the USB-port of your computer. (Some USB-hub comes with an individual PSU, in that case, you should power on the PSU first.)

- If your PC shows up “setting up the driver”, please wait it to finish.
- Run the “zadig_v2.0.1.exe” in the software package you download.
- Choose “Options—>List all drivers”, and then in the pull-down list. There will be several “CP2102 USB to UART Bridge Controller” in the list, choose each one and click “Replace Driver” (Or “Reinstall Driver”). For example, if you connect 2 miners to a USB-HUB, then there will be two “CP2102 USB to UART Bridge Controller” in the list, you should choose each one and click “Replace Driver”.
- Please remeber which USB-port on the USB-hub the miners were connected to.
- Disconnect all the miners from the USB-HUB. (But keep the USB-HUB connected to your computer.)
- Power on one miner, then connect the miner to the same USB-port the miner was connected before on the USB-HUB.

- Run “autorun.bat”. This one starts work.

- Then power on another miner, and connect it to the same USB-port the miner was connected before on the USB-HUB too.
- Then the black console will show some infomation about that another antminer U3 is detected. And the console will run both miners together.


- Important: you should connect the miners one by one to the USB-HUB. DON’T connect all the miners at one time. (Or the autorun.bat may get crashed.)
Troubleshooting
- Q: I got many HW error when mining, why is that? And what can I do?
- A: If you got some errors when mining, that’s normal. But, If you got many errors, try to:
- stop mining, power off the miner, and wait for some seconds, start again.
- run the miner one by one, if it is running ok then the miner is ok. It is recommended to connect 2 units at most to one computer. (When tested, HW error may occur if more than 2 units are connected to one PC)
- change to another mining pool.
- check if your network is fine
- change to another USB port. Change the USB port which you connected your miner to.
- change the PSU. If you use your ATX PSU for the miner, try a more powerful PSU.
